筆記 <<
Previous Next >> 組員fork git pull 注意事項
coppeliasim 新增球體,旋轉軸應用
1.如何新增一個直徑0.2,有物理屬性的球體?
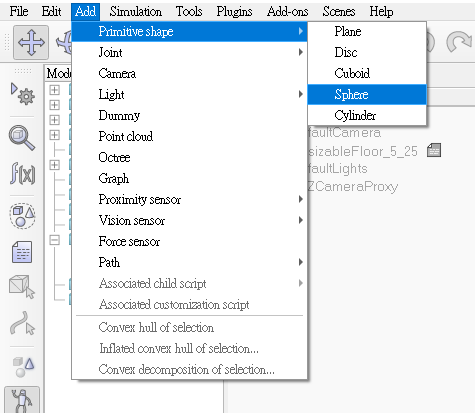
然後將x-size(直徑)調至0.2,然後按[Ok]。
---
2.如何再複製一個?
對Sphere案右鍵
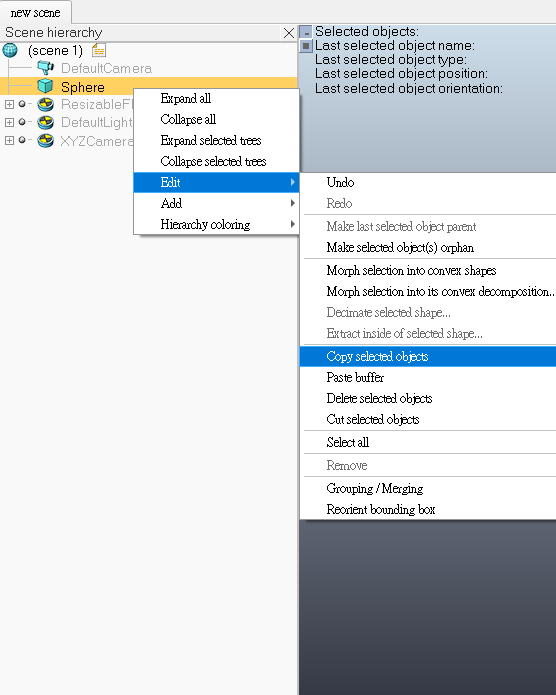
然後到Edit貼上
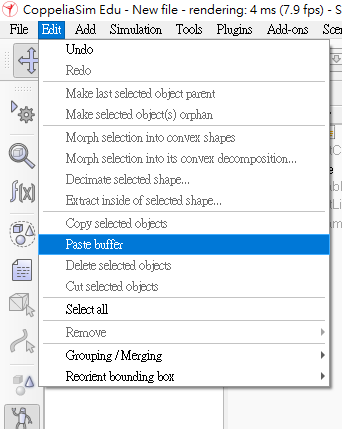
然後兩顆一模一樣的球就會重疊在一起。
---
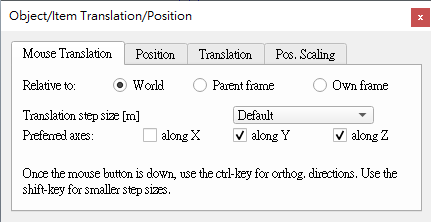
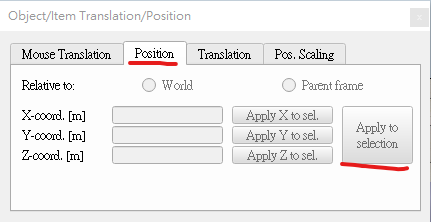
3.如何移動球體?
點選紅圈內的按鈕,然後再輕點想移動的球體。
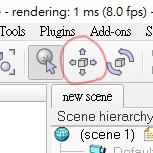
這個視窗可以調整X,Y,Z軸的自由度(勾選即可解鎖自由度)。
---
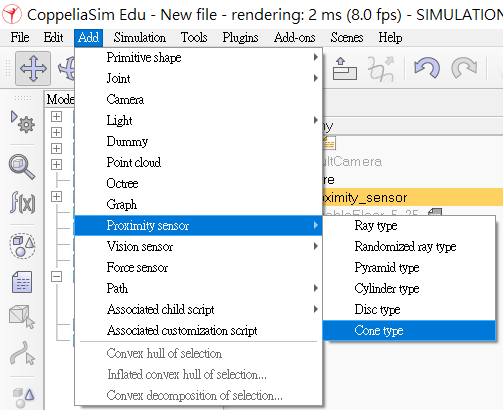
4.如何新增感測器?
新增完再將感測器拖曳到Sphere中。
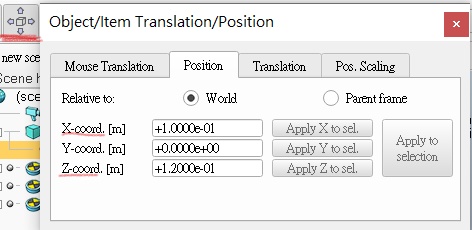
接著調整感測器位置,輕點感測器,再點紅色底線按鈕,X輸入0.1,Z輸入0.12。
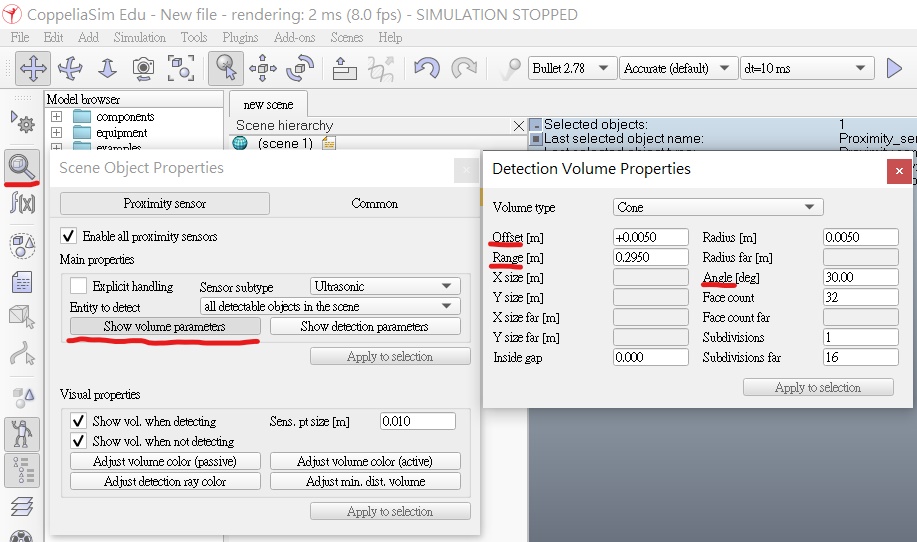
調整感測器大小參數,輕點感測器,點選紅色底線按鈕,offset輸入0.005,range輸入0.1,angle輸入30。
---
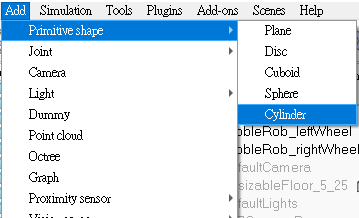
5.如何新增車輪:
首先新增一個新場景。
新增圓柱體,並調整大小 尺寸為(0.08,0.08,0.02)。

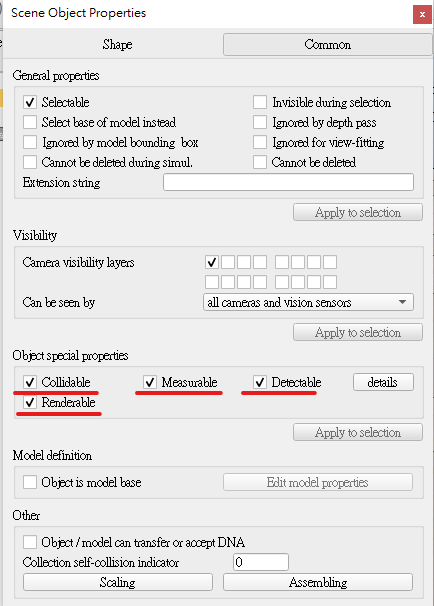
在該圓柱的object common properties中啟用 Collidable,Measurable,Renderable和Detectable。
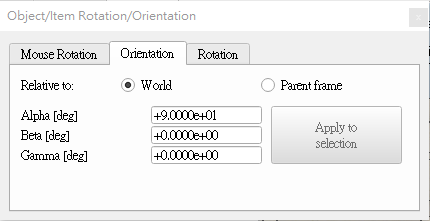
調整圓柱體位置 將圓柱的絕對位置設置為(0.05,0.1,0.04),並將其絕對方向設置為(-90,0,0)。

改名為bubbleRob_leftWheel並複製。
貼上,並調整絕對位置設置y為-0.1Y在改名為bubbleRob_rightWheel。
複製兩個輪子並貼到主場景。
---
6.有了輪子,那如何新增馬達?
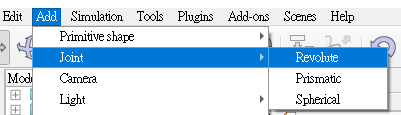
案ctrl,讓馬達與左輪都在選中狀態
點選

在position中,點擊apply to selection
點選

在orientation中,點擊apply to selection
將輪子拖入馬達中

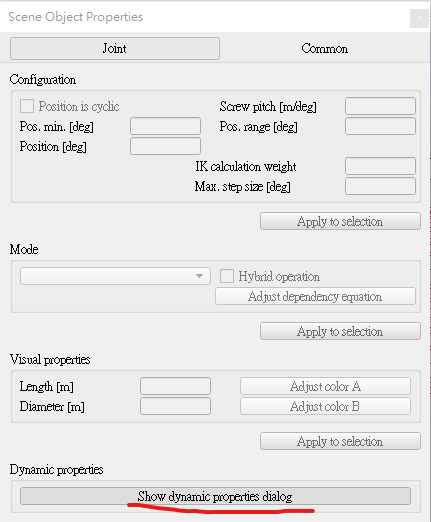
選中馬達,點選

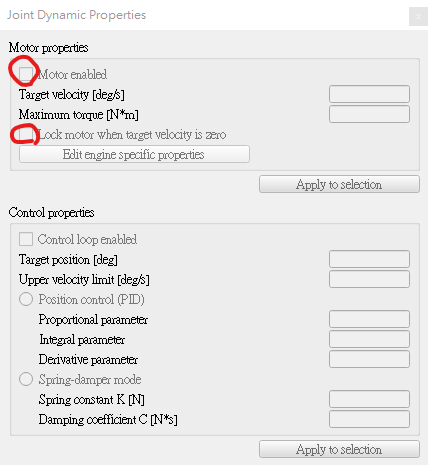
點選
勾選
筆記 <<
Previous Next >> 組員fork git pull 注意事項